
Guide of Enable DMA Protection
2025/01/21
Kernel Direct Memory Access (DMA) Protection is a Windows security feature that prevents unauthorized access to memory by external peripheral devices. First, check if Kernel DMA Protection is enabled using the following method:
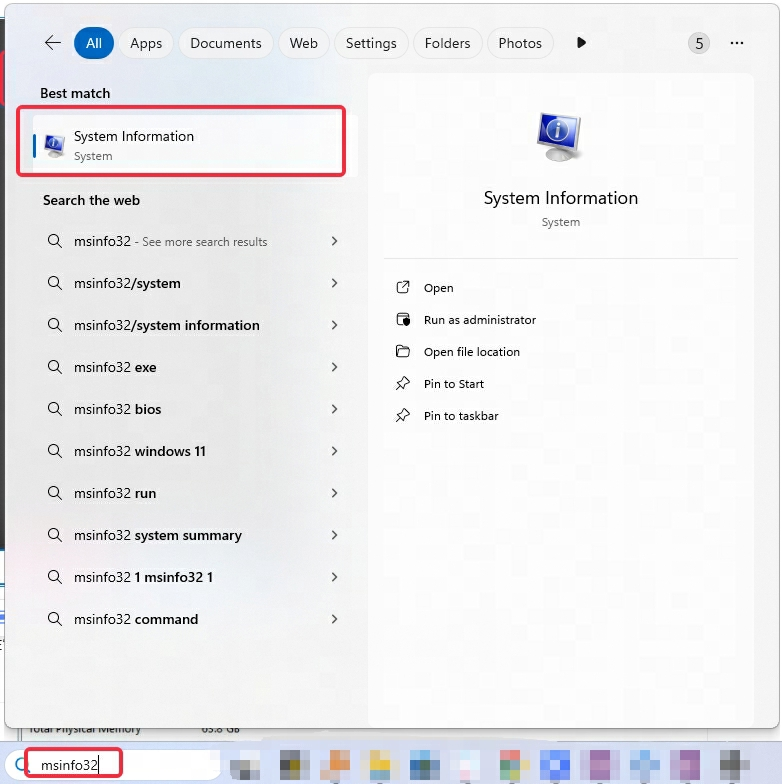
Search for "msinfo32" in the system search box and click on "System Information" to open it.
On the "System Information" page, scroll down in the "System Summary" section to find "Kernel DMA Protection" and confirm whether it is enabled.
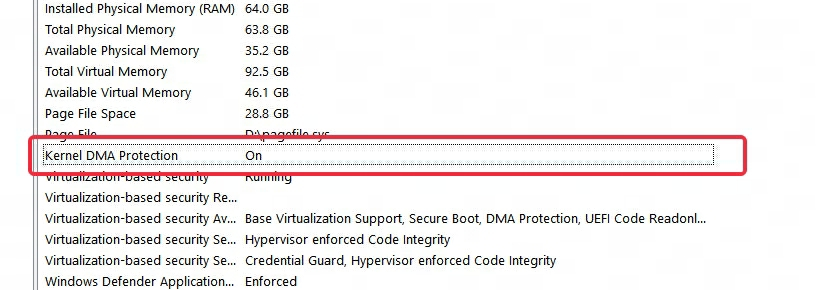
If it is enabled, no changes are necessary. If it shows "Disabled," please refer to the following steps to enable it manually:
On the previously opened "System Information" page, confirm your computer's motherboard manufacturer.

Restart your computer and press the motherboard BIOS startup key during the boot process to enter BIOS mode.
Note: The BIOS startup key varies by motherboard brand; players can check the information organized in the picture below or search for the BIOS startup key for their motherboard brand.
| Motherboard Manufacturer | Asus | Lenovo | Gigabyte | Acer | HP | MSI | Dell |
| BIOS Startup Key | F2 or Delete | F2 or Fn+F2 or F1 | F12 | F2 | F10 or Delete | Delete | F2 |
In BIOS mode, enable IOMMU (Intel VT-d, AMD-Vi) and Kernel DMA Protection.
Note: The BIOS pages of different motherboard brands vary, and the names of options are not entirely consistent.
It is recommended to search for tutorial videos on "How to enable IOMMU (Intel VT-d, AMD-Vi) and DMA Protection on (motherboard name) motherboard (Intel/AMD) platform" or visit the motherboard manufacturer's website and follow their instructions.
If you find that there are no related settings in the motherboard BIOS, it may be due to an outdated BIOS version. Please upgrade the BIOS version first before proceeding.
After completing the settings in BIOS, exit and save the changes to continue the system boot process. Once booted successfully, "Kernel DMA Protection" in "System Information" will display as "Enabled."
Steps to Enable the Motherboard
Micro-Star Motherboard:
INTEL Platform:
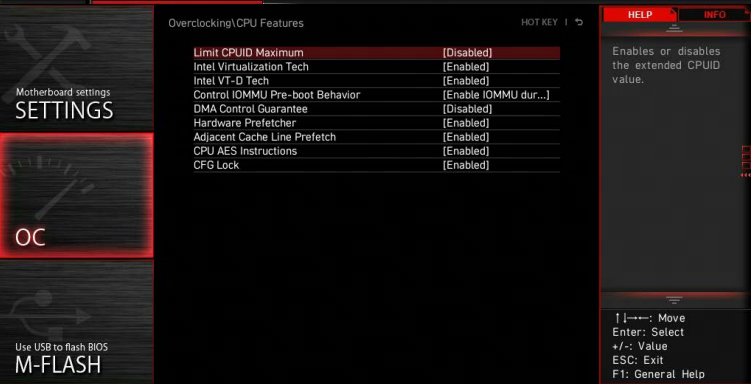
After entering the BIOS, select OC (Overclocking), find CPU Features, and press Enter to enter.
In CPU Features, set Intel VT-D Tech to Enabled.
If there is a Control IOMMU Pre-boot Behavior option, set it to Enable IOMMU during boot; if there is no Enable IOMMU during boot option, set it to Enable IOMMU.
AMD Platform:
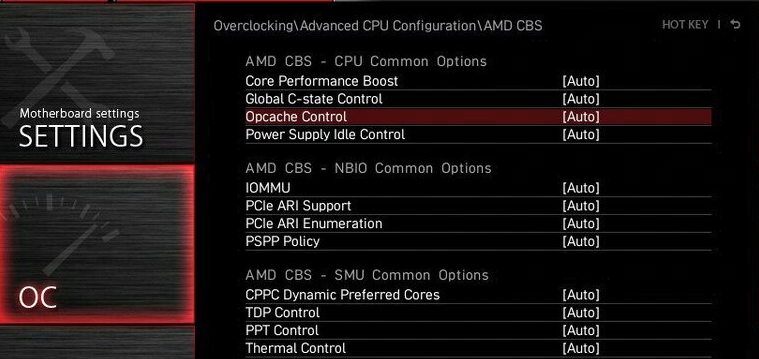
After entering the BIOS, select OC (Overclocking), find Advanced CPU Configuration, and press Enter to enter. Then find AMD CBS and press Enter to enter.
In AMD CBS, set IOMMU from Disabled/Auto to Enabled.
If there are DMA Protection and DMAr Support options, set both from Disabled/Auto to Enabled.
Asus Motherboard:
INTEL Platform:
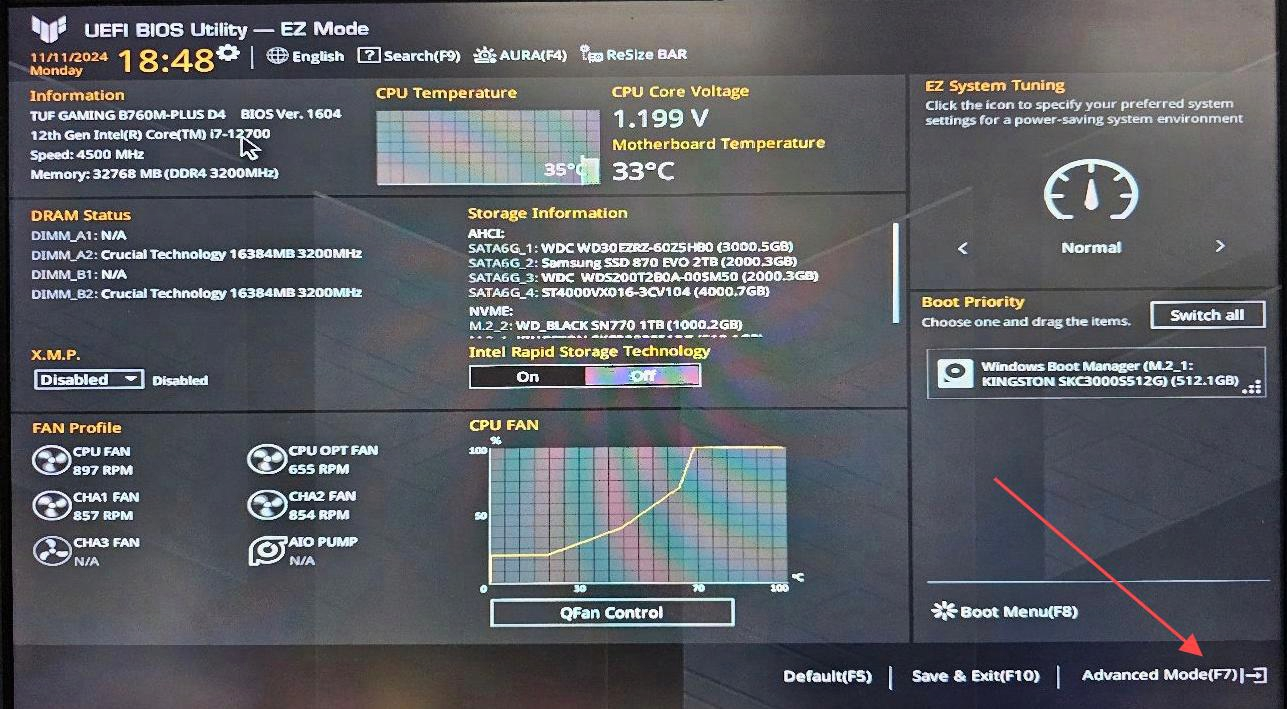
After entering the BIOS, press F7 or click on Advanced Mode in the lower right corner to enter the Advanced page.
Select System Agent (SA) Configuration and click to enter.
Set VT-d to Enabled and set Control IOMMU Pre-boot Behavior to Enable IOMMU during boot.
If there is no Enable IOMMU during boot option, set it to Enable IOMMU.

AMD Platform:
After entering the BIOS, press F7 or click on Advanced Mode in the lower right corner to enter the Advanced page.
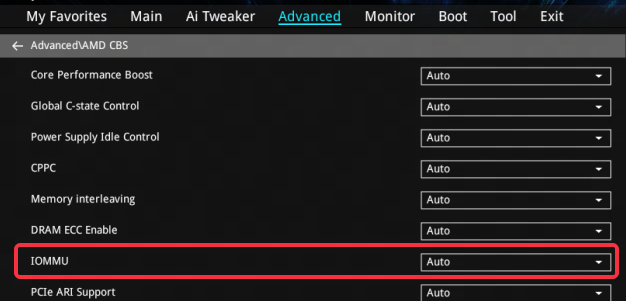
Select AMD CBS and click to enter. Set IOMMU from Disabled/Auto to Enabled.
If there are DMA Protection and DMAr Support options, set both from Disabled/Auto to Enabled.